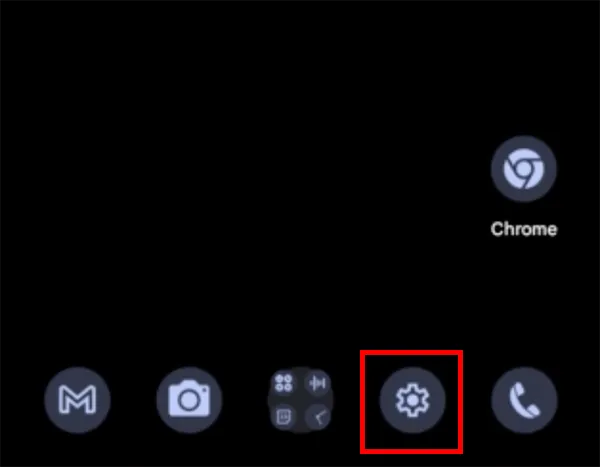
Copy the EID first. Click Settings from the home screen.
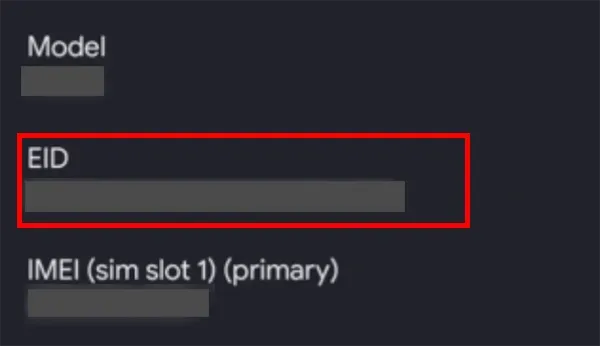
Copy your smartphone's EID.
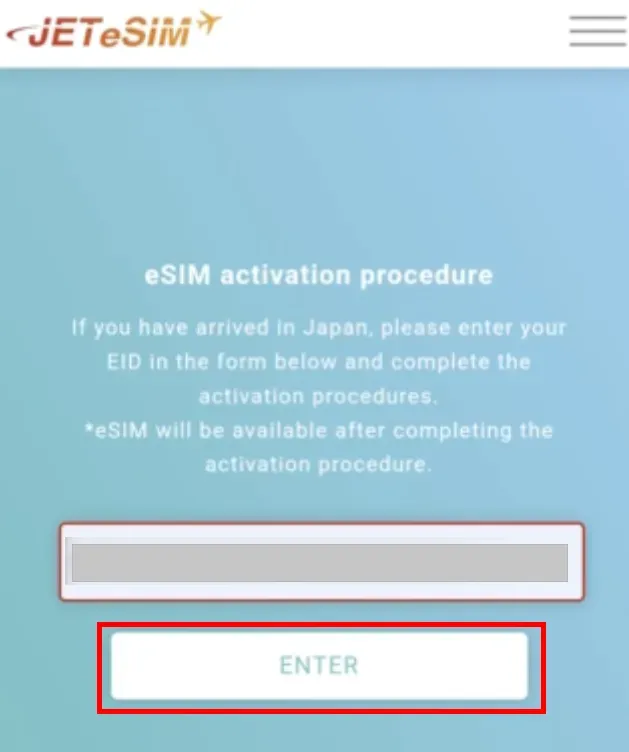
Access the activation site
Enter the EID you copied.
Click ENTRY.
An activation code will be displayed.
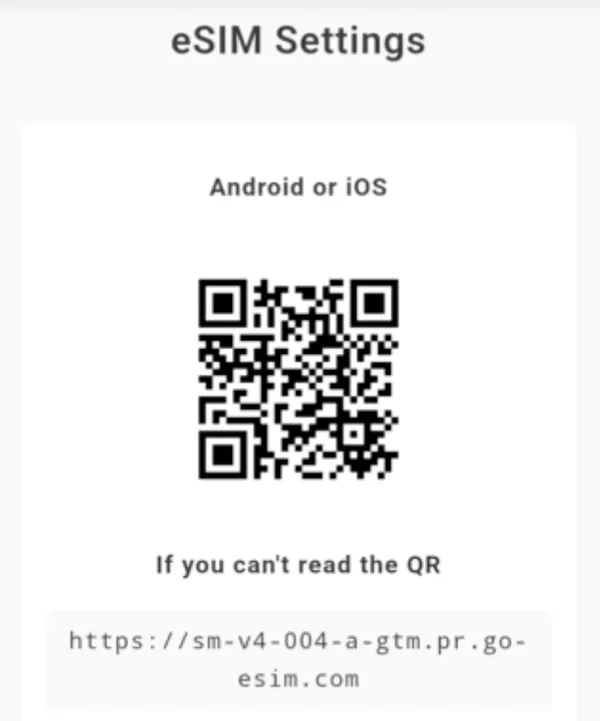
Read the QR code from My page and proceed to add eSIM settings.
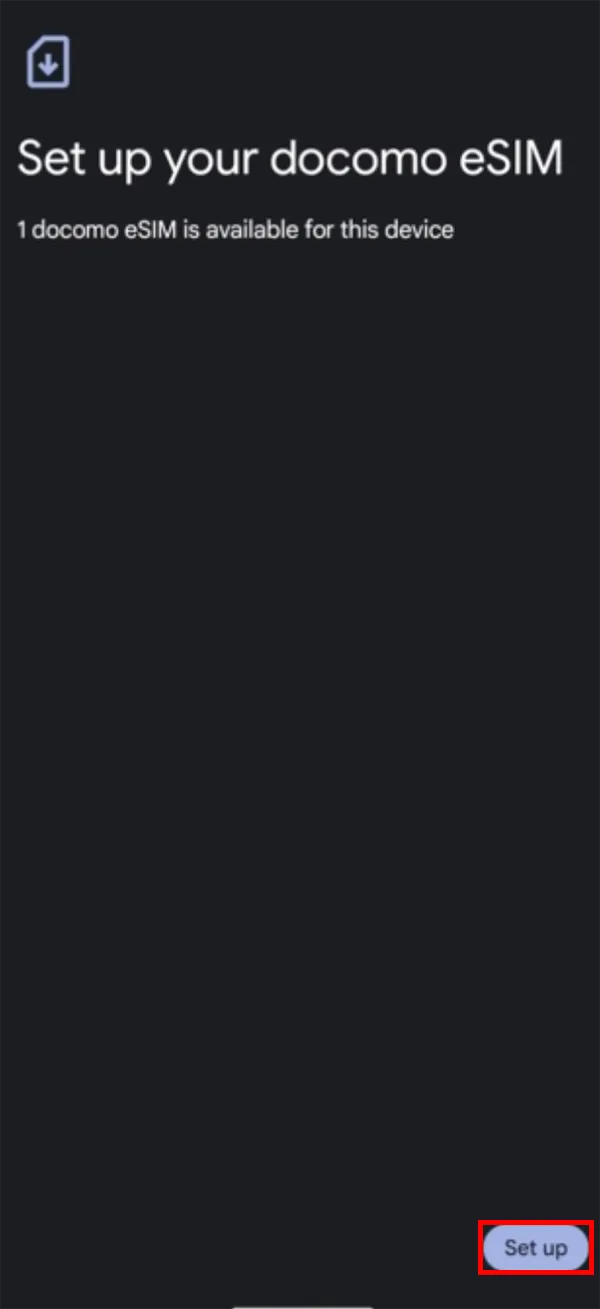
Proceed with set up.
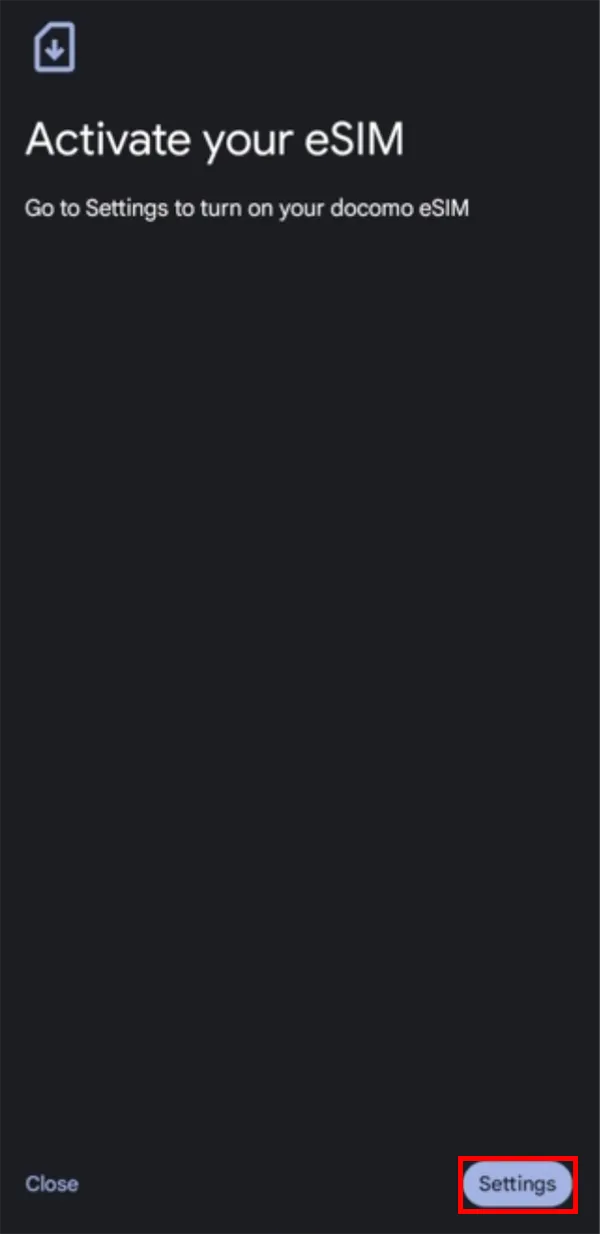
The eSIM will be activated.
Proceed with the settings.
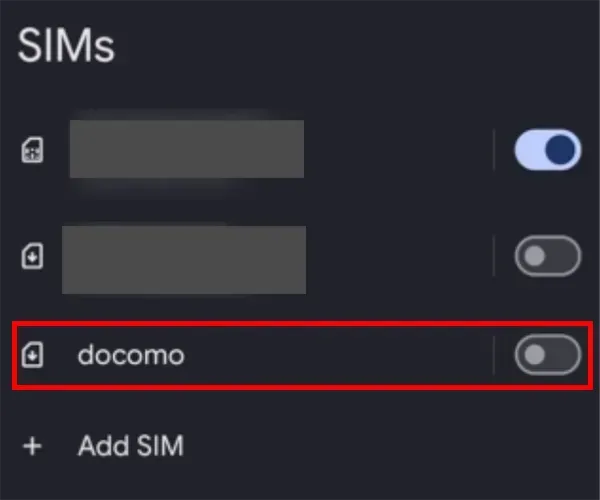
Configure the added eSIM.
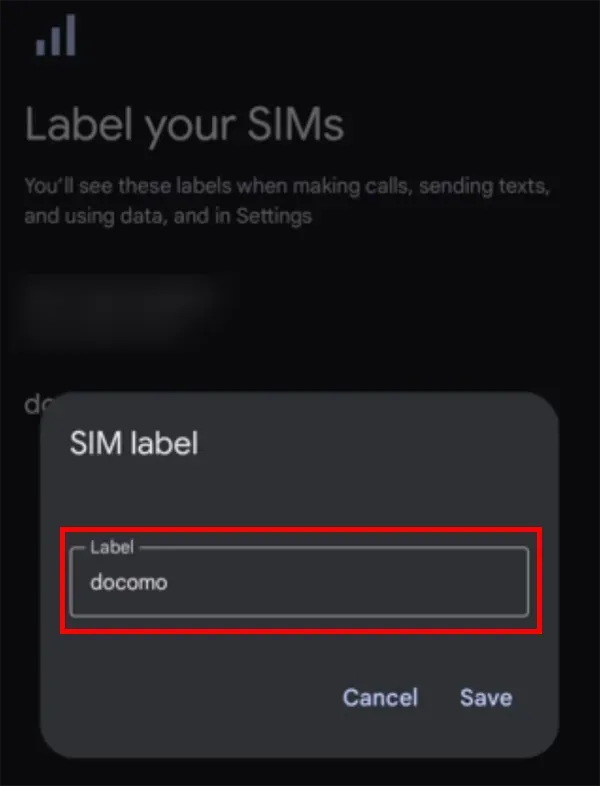
You can set the r label of the added eSIM.
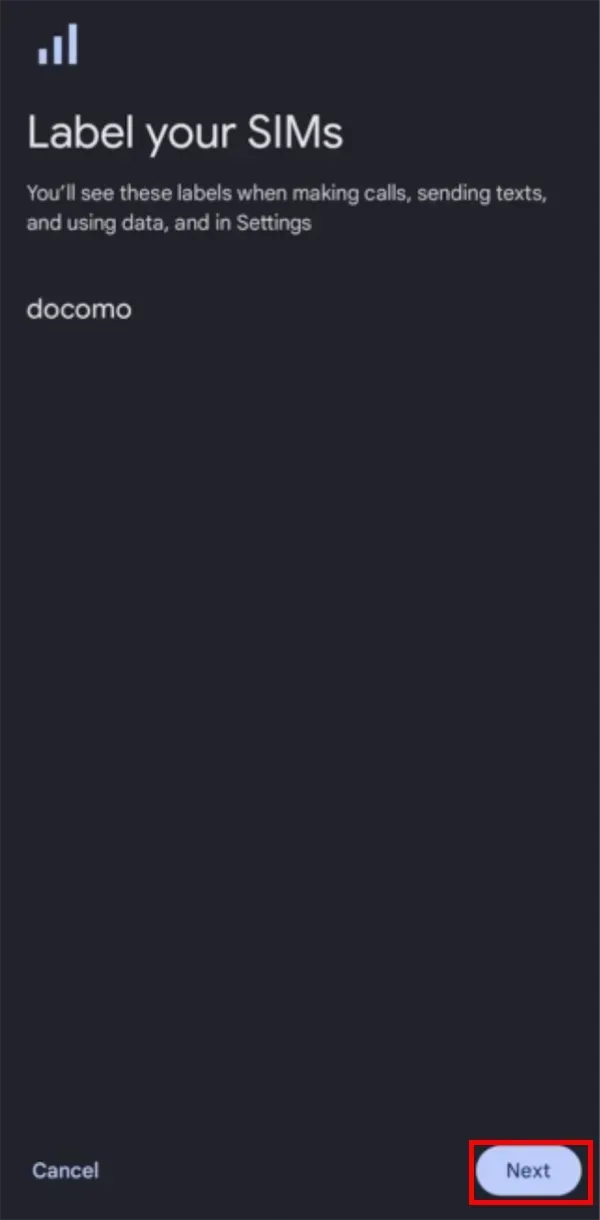
Click Next.
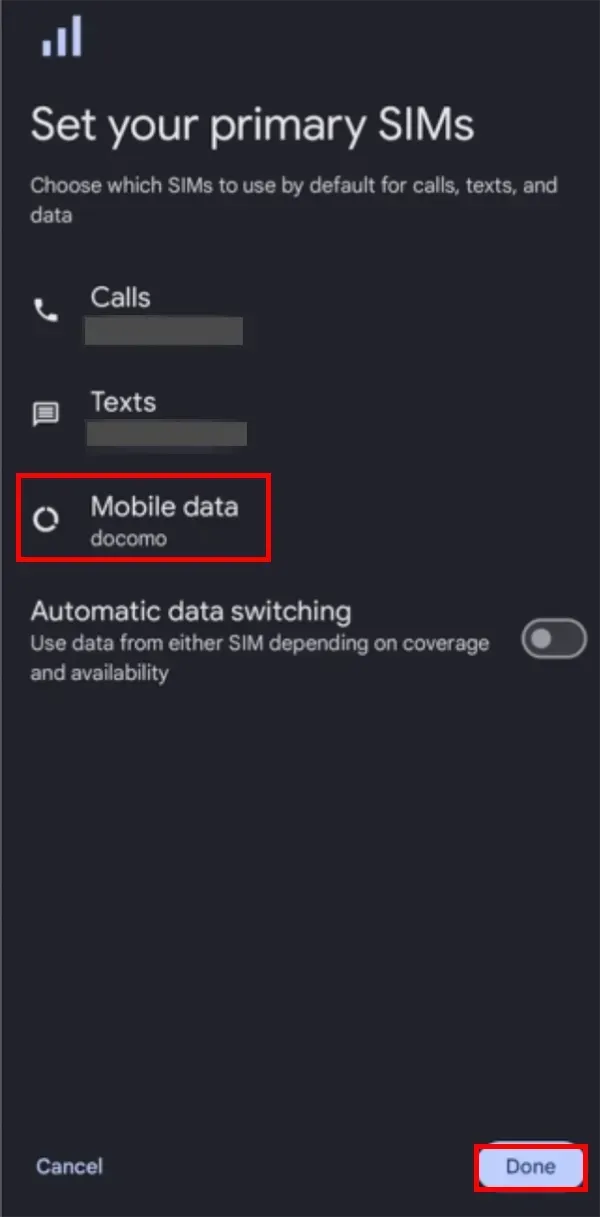
Set [Mobile data] to the label you set earlier.
Click Done.
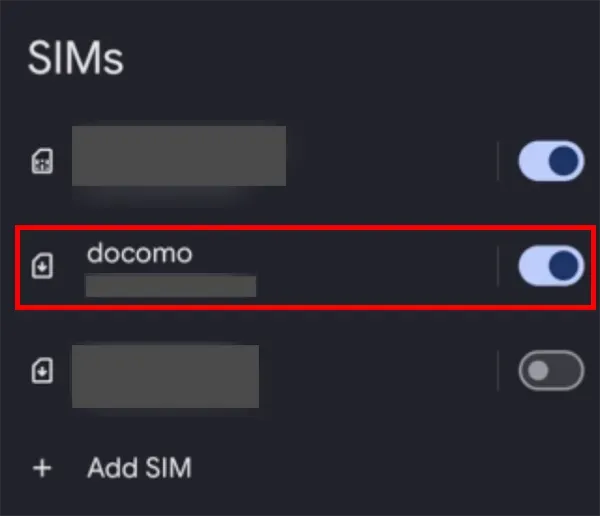
Click the label of the eSIM you added.
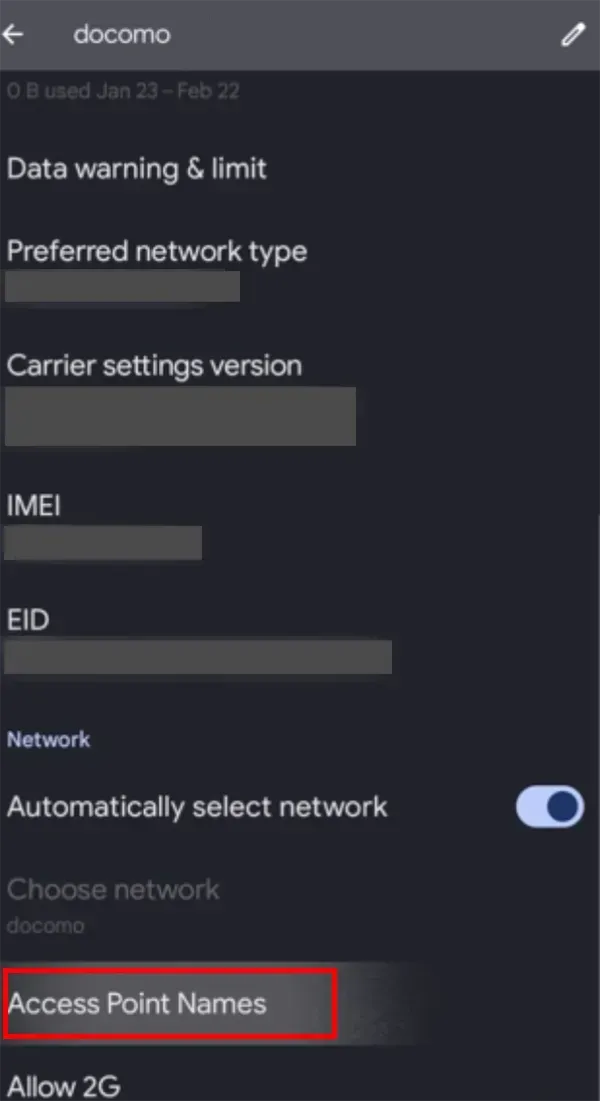
Click Access Point Names to configure APN settings.
Next, set up the APN.
Tap [Access Point Name] on the settings screen of the selected SIM.
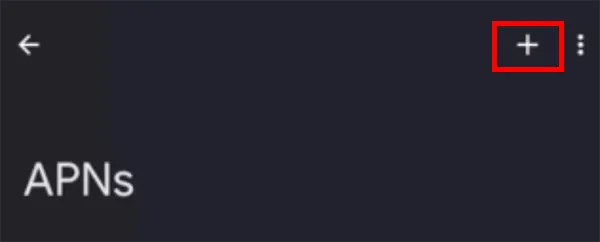
Tap [+] at the top right of the [APNs] screen.
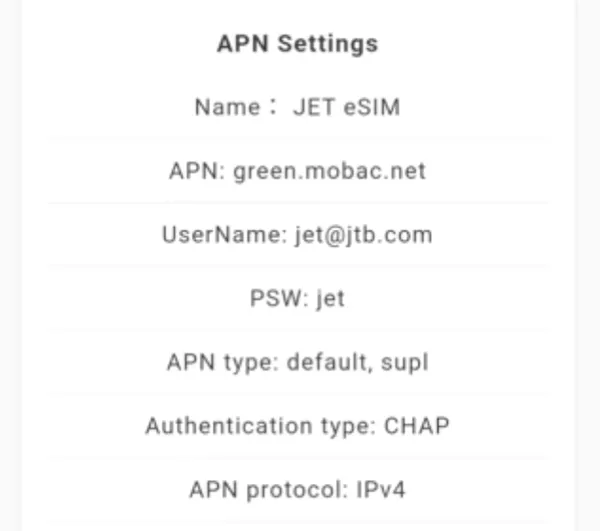
Check the APN settings from My Page.
Enter each item.
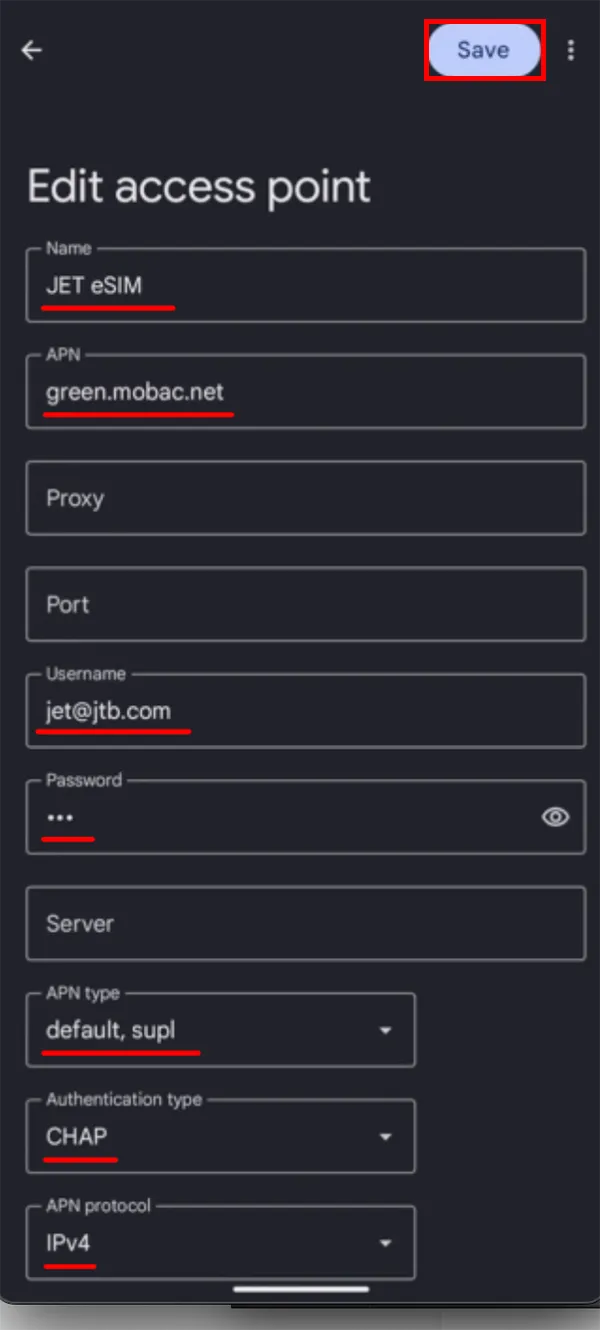
Name: Type "JET eSIM"
APN: Type "green.mobac.net"
Username: Type "jet@jtb.com"
Password: Type "jet"
APN type: Select "default, supl"
Authentication type: Select "CHAP"
APN protocol: Select "IPv4"
Click Save.
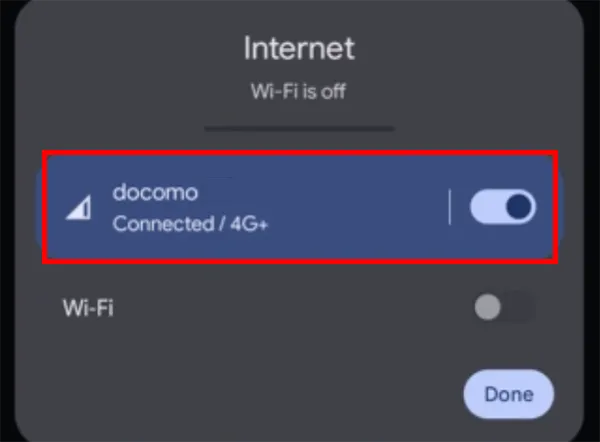
Turn off Wi-Fi and check the connection.